Reverse engineering USB devices 101: Understand your target

We’ve learned USB basics and now we are ready to open our USB sniffer and dig into that device we want to reverse but trying to understand what we want to reverse before reversing leads to an easier and less painful work. So first we need to ask ourselves.

How does our targeted device work from a high level perspective?
Understanding the higher level functionality of our targeted device is necessary to successfully reverse it and can provide hints about the inner implementation. In this tutorial our target device is the infamous CH340 chipset. A chipset that bridges the gap between USB computer and serial-based hardware.

What’s a serial communication?
Serial communication is rather broad term but in its inner core means that data is sent one bit at a time. There are tons of different protocols like the venerable RS232, the widely used in the automotive industry CAN bus and even military ones like MIL-STD-1553.

Serial vs parallel

CH340 chipset is one of the multiples USB to serial converters made to add compatibility between PC with USB ports and old serial peripherals. It is not based in any particular protocol so it would be possible to implement different serial protocols using it.

What are the common serial features
There are a lot of different signals in serial protocols but for the sake of simplicity this is the core of a serial communication.
– RXD pin where data is received.
– TXD pin where data is sent.
– Flow control pins to control wether our devices are ready or not ready to send and receive information. Typical signals are RTS/CTS and DSR/DTR

How a USB device would emulate a serial port?
Serial communications need two pin for sending and receiving data. That translates well to USB endpoints so we will probably find two USB IN/OUT endpoints. There is more than one way to send data in USB. What would be the best USB transfer protocol to emulate a serial port? if we look back to the previous post we have:

– Control transfers for setting and reading configuration.
– Bulk transfers to perform large data transactions where data integrity must be guaranteed.
– Iso transfers where what matters is delivery rate and latency.
– Int transfers for shorts bursts of data.

We can easily discard both control and int transfers. Both bulk and iso transfers would be ok for implementing a serial port. ISO endpoints would guarantee faster rates at the expenses of no error correction (not implemented by default in a serial communication either). Bulk transfers don’t guarantee as much speed but data integrity is assured. What transfer a manufacturer would select?
Probably bulk transfers. Serial communications are much slower than bulk transfers so the choice is clear and using bulk transfers you gain error correction. The option is clear.

Serial ports must be configured correctly before sending and receiving data. Usual values are:

– Baud rate.
– Parity.
– Data bits.
– Stop bits.
– Flow control on/off

The CH340 chipset must know the configuration to correctly read RXD and TXD pin voltages and send them through the bulk endpoint. We must assume that these values are sent through control transfers.

There are two kinds of flow control:
– Hardware based: Some lines are asserted raising or lowering the voltage. This is commonly known as out-band signaling because the signaling comes from a different channel than the data.
– Software based: Some bytes are send to indicate whether the flow must stop or resume. This is obviously in-band signaling.

Hardware flow control is what can cause us some headaches here. The signaling goes out of the band so, if we want to be close to the emulated system, we would need a new endpoint acting as flow control. Latency could be very important here. So I would choose between int or iso transfers.
But it could be implemented in a different way. Maybe there is a control transfer to ask for the line status, maybe some packets are sent through the bulk endpoints at fixed intervals with data about the flow control level.

We just outlined what we probably will find in the next step:
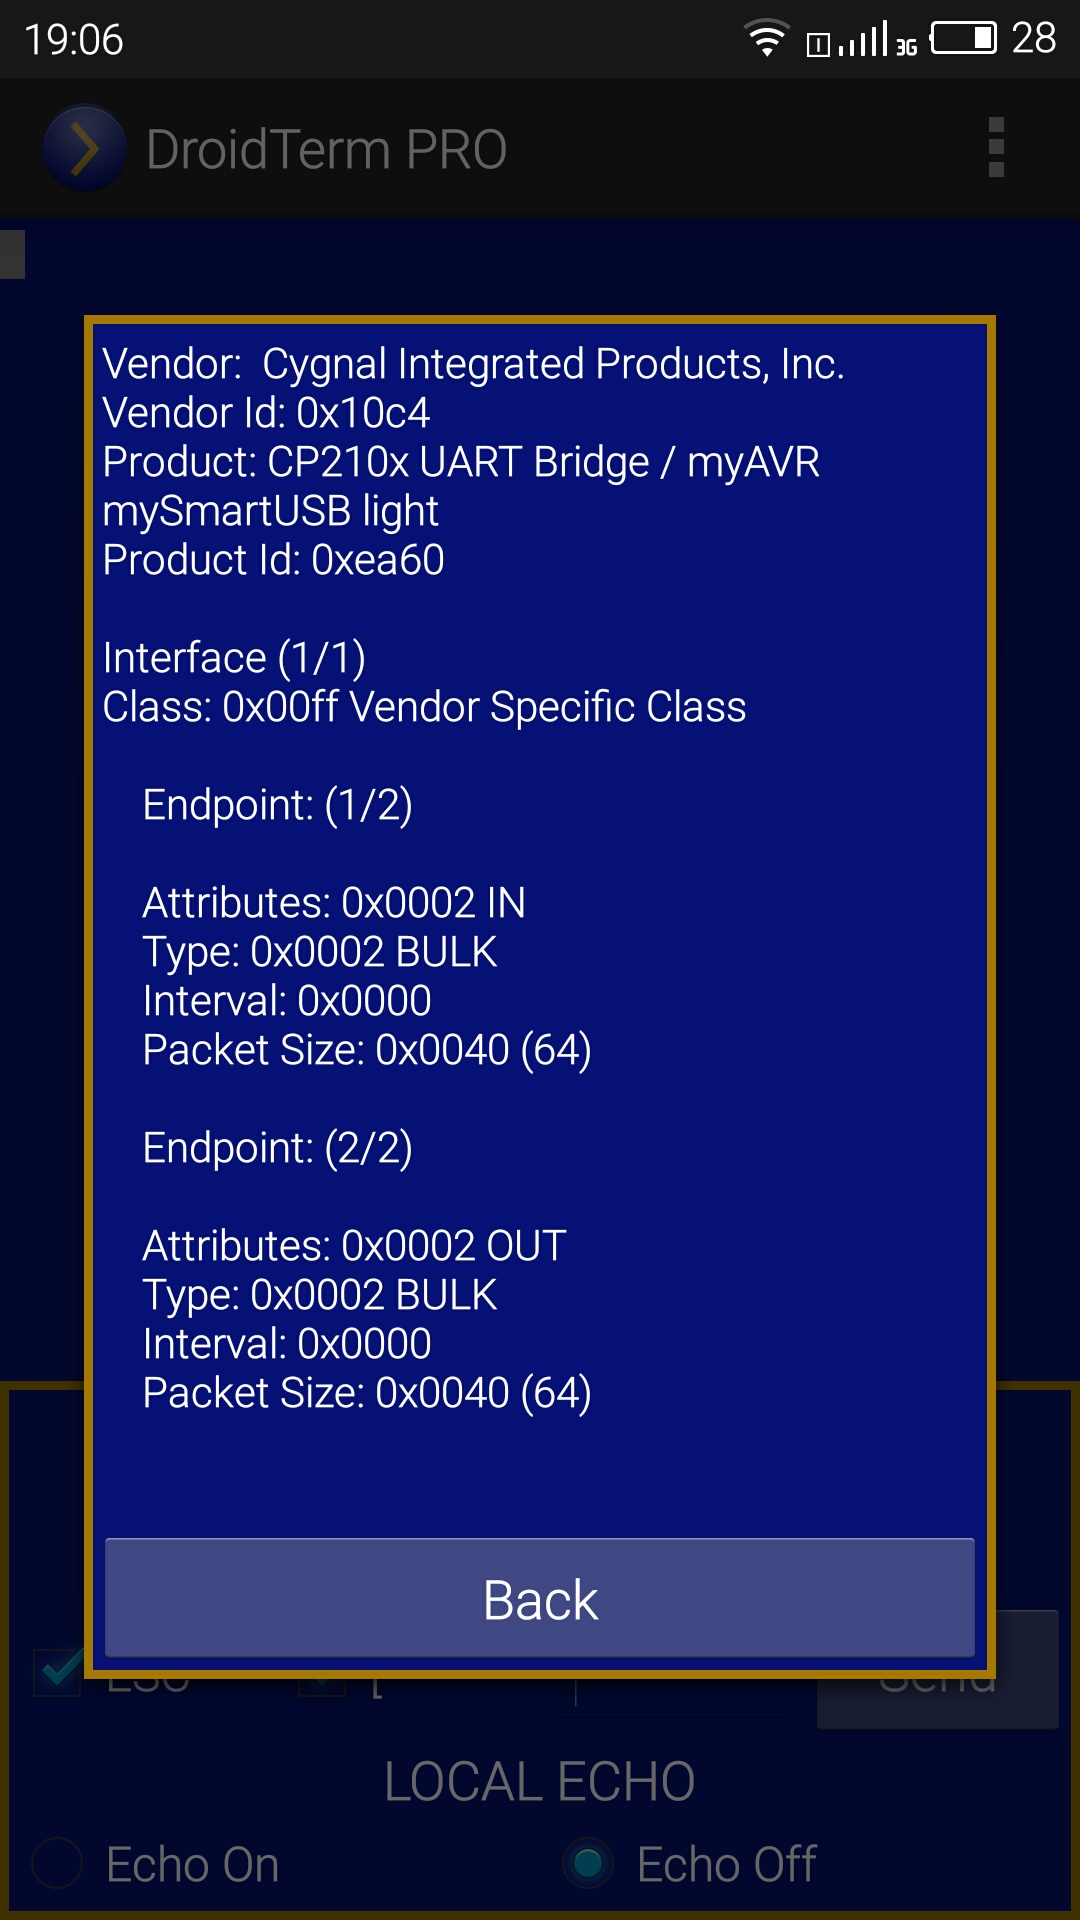
– (Very probable) Two Bulk endpoints (IN/OUT) for exchanging data.
– (Very probable)A set of control transfers to configure baud rate, parity, data bits, stop bits and flow control modes.
– (Maybe) A INT or ISO endpoint for emulating hardware flow control.
– (Maybe) A control transfer to check flow control signaling. This approach would require polling at fixed rate.
– (Maybe) Packets sent alongside data with information about flow control.

We now have some understanding of our target. It will help us greatly when surfing through multiple USB calls but we will see that in the last post.

Reverse engineering USB devices 101: Introduction

Reverse engineering USB devices 101: USB Basics

Reverse engineering USB devices 101: USB Basics

We’ve got our USB sniffer working and our targeted USB device is ready for some reverse engineering but before fun gets started, we need to grasp the basics of the USB protocol. Let’s dive a little into the USB realm!

Host-Peripherals
The architecture of USB is host-based where usually a PC acts as a host of one or multiple devices. The host controls everything from detecting new devices, managing correctly data as it flows through the bus, error checking and providing power for every USB connected. USB networks are defined as tiered-star networks where some devices can act as hosts for new devices.

As you can easily realize, most of the hard work is performed by the USB host but peripherals have also some tasks to do. Peripherals need to response to petitions to start communications and must obey the flow control imposed by the host.

When you start your sniffer and start capturing traces, you are watching every packet sent and received by the USB hosts. This communication flow is what it will allow us to understand how our target device is working.

USB classes
The USB standard defines several categories (called device classes) where USB devices can fit in. Every mouse for example shares a core functionality. For this reason virtually every USB mouse fits into the HID class (Human Interface Device). Most common USB device classes are:
– Human Interface Devices(HID)
– Mass Storage
– Printer
– Video

This solved old issues that were present in serial or parallel devices because every manufacturer implemented their protocol on their own ways. For this reason the plug and play is no longer (usually!) plug and pray.

This is not enforced by the USB implementers forum. Manufacturers could produce a USB mouse that doesn’t fit into the HID devices but it would be very impractical. For not so common devices like USB to serial converters this is pretty common. These devices should fit into the CDC (Communication device class) but usually they are defined as a Vendor specific class.

eee

Example of a USB device that doesn’t fit into any standard class, fortunately the CP210x is well documented

Endpoints and transfers
Endpoints can be understood as the sources and sinks of data. Every USB device has at least one endpoint. The mandatory endpoint is called Endpoint 0 and it is where the control transfers issued by the host are directed.

Endpoints are defined by:
– Direction: IN (Device to Host), OUT (Host to Device).
– Transfer type: Control, Bulk, Int, Iso.
– Polling interval.
– Maximum packet size.

There are four different transfers that can be issued for an endpoint. A brief summary of them would be:
– Control transfers: Used for device identification and configuration and directed to endpoint 0.
– Bulk transfers: Used for transferring data when time isn’t critical. Speed is not guaranteed but there is error correction
– Iso transfers: Very suitable for audio and video streaming, delivery rate and latency are guaranteed but there is no error correction.
– Int transfers: Used mainly by HID devices. They guarantee latency only but there is error correction.

Control transfers will allow us to setup our target device exactly as the obscure manufacturer driver is doing. For that reason it’s necessary to dive deeper into control transfers. These transfers are composed of three stages. Setup stage, data stage (optional) and status state. In the setup stage the host transmits the request to the device with all the information about this particular request. If some data is required from host to device or vice-versa will be sent or received on the data stage. Finally the device will inform about the final status of the transfer in the status stage.

Understanding what is sent over the setup stage is needed to replicate how our device target works. In every setup stage 8 bytes are sent to specify what control transfer we are just sending, how many bytes we expect from the data stage, direction of the data stage…
These are the 8 bytes we need to understand:

– bmRequestType:
It’s a byte that specifies the direction of data flow, the type of the request and the recipient
– bit 7: Direction bit (0: device to host 1: device to host)
– bit 6 and 5: Request type bits (00: USB standard request 01: request for a specific USB class 10: vendor specific request
– bit 4 through 0: Recipient bits that define if the request is directed to (00000 device), (00001 specific interface), (00010 endpoint) or other element (00011).

– bRequest:
This byte specifies the request. Every defined request has a unique bRequest value. When bmRequestType is 00 bRequest means a USB standard request. If bmRequestType is set to 01 the request will be specific for a given interface and when bmRequestType = 10 this request is specific for this vendor and product.

– wValue:
Two bytes that the host may use to pass information to the device.

– wIndex:
Two bytes that the host may also use to pass information to the device, usually an index or offset like the interface or the endpoint.

– wLength:
Number of bytes expected on the data stage.

This knowledge is  what I consider a bare minimum to start hacking USB devices but the more you read about it the better. I strongly recommend to you to check out the amazing USB complete for a great USB reference.

We now have a good starting point to begin our reverse engineering feats but before starting I think it is necessary to understand our target device. In the next post We will briefly study what the CH340 chipset does(emulating a serial port). This understanding will really give us a better approach to reverse engineering the infamous CH340/341.

Reverse engineering USB devices 101: Introduction

Reverse engineering USB devices 101: Understand your target

Reverse engineering USB devices 101: Introduction

Because of my work adding support for multiple USB to serial devices in UsbSerial I’ve had to deal with very different chipsets. Some of them like those manufactured by Silicon Labs like the CP2102 or the CP2130 are surprisingly well documented, not only with electrical and mechanical datasheets but also with documentation for driver developers.

Sadly others are not. FT232, one of the most common USB to serial devices out there lacks of official documentation but fortunately those hardcore developers of the Linux and BSD kernel managed to add a very good support long time ago. That is nothing compared to the very obscure CH340/341 chipset.

An example of an USB-Serial cable using CH340 chipset

An example of an USB-Serial cable using CH340 chipset

CH340/341 is a chipset without any kind of documentation besides electrical stuff and it is not well supported outside Windows (I bet it is not well supported even there). With so many custom chipsets and the standard CDC devices these weird chips should have been ignored long time ago. But one shouldn’t underestimate the power of cheapness. With the advent of the maker movement and the Arduino revolution, because of the Arduino open architecture, the market was flocked with Chinese Arduinos clones that replaced the FT232 with the CH340. Ignoring this infamous chip was no longer an option.

I started adapting other implementations but they weren’t working on every CH340 so finally I had to use the last bullet, start from the scratch and reverse engineering this thing! Here it’s the code, if you want to check it out

These posts aim to serve as introduction for people looking for more practical knowledge about USB and eager to reverse engineer USB devices. CH340, although almost non documented, it’s still a very simple USB to serial converter so it is a good candidate for a tutorial. This whole thing may sound complicated but, as you will see, it is easier than expected.

What will we need?
1) A windows computer
Generally speaking, hardware manufacturers put the best of their efforts on developing good Windows drivers for their own products. For some of them supporting of Linux and OS X is secondary in the better cases. This is normally the most common reason for reverse engineering USB or other devices. For this reason we need a Windows computer to be able to see how the device behaves with the manufacturer drivers.

2) USB software sniffer
A good USB software sniffer is mandatory to analyze every packet shared between our PC and the USB devices. There are some alternatives:
– Usbpcap with Wireshark (free and open source)
– Usb analyzer from Eltima software
– USBTrace from Sysnucleus
– USBlyzer

All of them should do the job but in my humble opinion, USBlyzer is by far the best of all them at the expense of a high price for hobbyists. Choose the right one for your needs.

What’s next?
Before starting, some knowledge of the USB protocol is required. This will be explained in the next post. Stay tuned!

Reverse engineering USB devices 101: USB Basics

Reverse engineering USB devices 101: Understand your target