I am going to start my new blog writing about things I have been working last month. In September I started to work in a very interesting project which one of its future branch involves natural interaction devices. This project uses Android as a main platform over other mobiles OS due to obvious reasons. Because this branch of the project nearly started when I was contacted, I was suggested to use an Android port able to run in X86 computer. At first I was like: Ok I get it, We mount an Android -X86 ISO using VirtualBox, VmWare or whatever and we will be able to use this curious thing. But soon I realized I would have to go deeper into OpenNI source code and PrimeSense sensor drivers. I must admit sometimes It was a real pain but at the end I finally achieved and it was rewarding. So I would like to share with you to save you pain and time.
– Android X-86
Android X-86 is a project to port Android to X86 platform. I used Android 4.0.4 but really I think you can use whatever version you want. First thing you must know: Asus Xtion Pro Live and other kinect devices,when used in linux systems or linux based systems as Android, depends on USBFS(USB File System) which in most versions of this OS family is deprecated. At least in genericX86 branch of Android-X86, as far as I know, this file system is enabled by default. In this case just only download an ISO and install it on ASUS EE PC or your favorite virtualization software. Unfortunately if USBFS is not enabled You have to build your iso with your changes:
- Download Android-X86 source code.
- Run your favorite text editor and open /yourAndroidX86/kernel/arch/x86/configs/android-x86_defconfig
- Set CONFIG_USB_DEVICEFS and CONFIG_USB_DEVICE_CLASS to yes.
Those lines should look like this:
#
# Miscellaneous USB Options
#
CONFIG_USB_DEVICEFS=y
CONFIG_USB_DEVICE_CLASS=y
In order to get USBFS working:
- Open /yourAndroidX86/device/common/generic_x86/init.rc
- Mount USBFS at /proc/bus/usb with 0666 permissions
mount usbfs none /proc/bus/usb -o devmode=0666
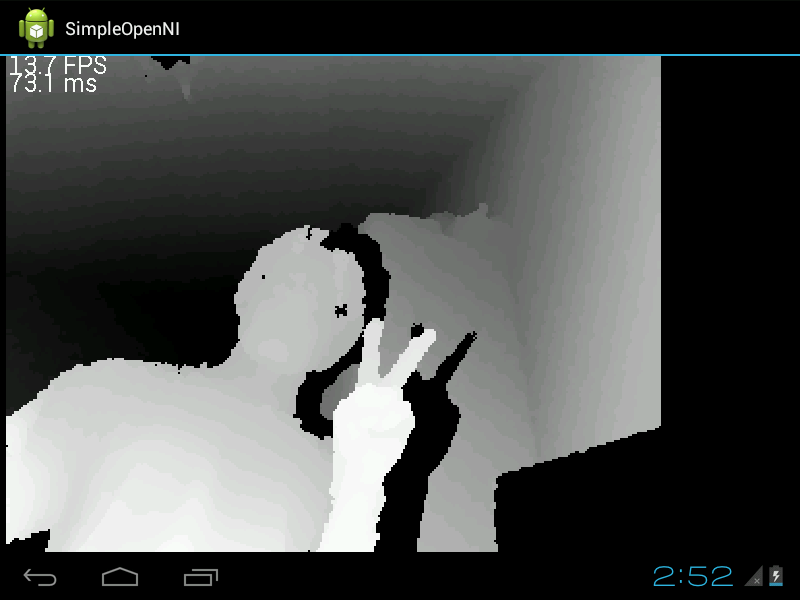
This line is what you are going to find all over the internet if you are trying to mount USBFS and usually It should be ok BUT, and I remark BUT due to Android applications run in a kind of sandbox, very pretty but walled to Linux resources too you are going to suffer if you want to run Android apps developed with standard SDK (You can still run C++ example apps provided with OpenNI but I know you want to see Depth or IR pretty images, no a simple command line application measuring fps).
So, It is going to be better if you put that line like this:
mount usbfs none /proc/bus/usb -o devmode=0777
Now You should be ready to build Android-X86, just follow instructions provided in the official website. They are pretty straightforward.
OpenNI and PrimeSense drivers
You are going to need to download Android Native Development Kit (NDK) besides OpenNI and PrimeSense drivers in order to get this working. But I am not going to repeat what is already perfect explained. Please, read this awesome post of Hirotaka Niisato and you will have installed android-ndk (I would install R9 at this moment) and cloned OpenNI and PrimeSense drivers easily. But not run that kind of “box of chocolates” command called ndk-build yet!! Some modifications are needed. Let´s start with OpenNI:
- First of all, Make a new folder under /yourOpenNIFolder/Include called Android-x86
- Create a new file called XnPlatformAndroid-x86.h under the folder you have created like this
#ifndef _XN_PLATFORM_ANDROID_X86_H_
#define _XN_PLATFORM_ANDROID_X86_H_

// Start with Linux-x86, and override what's different
#include "../Linux-x86/XnPlatformLinux-x86.h"

//--------------------------------------------------
// Platform Basic Definition
//---------------------------------------------------
#undef XN_PLATFORM
#undef XN_PLATFORM_STRING

#define XN_PLATFORM XN_PLATFORM_ANDROID_X86
#define XN_PLATFORM_STRING "Android-x86"

#define XN_PLATFORM_HAS_NO_TIMED_OPS
#define XN_PLATFORM_HAS_NO_CLOCK_GETTIME
#define XN_PLATFORM_HAS_NO_SCHED_PARAM
#define XN_PLATFORM_HAS_BUILTIN_SEMUN

#define XN_PLATFORM_LINUX_NO_GLIBC
#define XN_PLATFORM_LINUX_NO_SYSV
#define XN_PLATFORM_LINUX_NO_GLOB
#define XN_PLATFORM_LINUX_NO_POSIX_MEMALIGN
#define XN_PLATFORM_LINUX_NO_SHM
#define XN_PLATFORM_LINUX_NO_PTHREAD_CANCEL

#endif //_XN_PLATFORM_LINUX_X86_H_
- Open /yourOpenNIFolder/XnPlatform.h and add the following line
#define XN_PLATFORM_ANDROID_X86 10
- Open, in the same folder XnOS.h and change
#elif (XN_PLATFORM == XN_PLATFORM_LINUX_X86 || XN_PLATFORM == XN_PLATFORM_LINUX_ARM || XN_PLATFORM == XN_PLATFORM_MACOSX || XN_PLATFORM == XN_PLATFORM_ANDROID_ARM)
to
#elif (XN_PLATFORM == XN_PLATFORM_LINUX_X86 || XN_PLATFORM == XN_PLATFORM_LINUX_ARM || XN_PLATFORM == XN_PLATFORM_MACOSX || XN_PLATFORM == XN_PLATFORM_ANDROID_ARM || XN_PLATFORM == XN_PLATFORM_ANDROID_X86)
- Now, move to /yourOpenNIFolder/Source/OpenNI/Linux and open LinuxProcesses.cpp and change
#if (XN_PLATFORM == XN_PLATFORM_MACOSX || XN_PLATFORM == XN_PLATFORM_ANDROID_ARM )
 #include <sys/wait.h>
#else
 #include <wait.h>
to
#if (XN_PLATFORM == XN_PLATFORM_MACOSX || XN_PLATFORM == XN_PLATFORM_ANDROID_ARM || XN_PLATFORM == XN_PLATFORM_ANDROID_X86)
 #include <sys/wait.h>
#else
 #include <wait.h>
and
#if (XN_PLATFORM == XN_PLATFORM_ANDROID_ARM)
static void getApplicationName(XnChar* strAppName, const XnUInt32 nBufferSize)
{
 FILE *pFile;
 size_t length;

 pFile = fopen("/proc/self/cmdline", "r");
 length = fread(strAppName, 1, nBufferSize, pFile);
 fclose(pFile);
}
to
#if (XN_PLATFORM == XN_PLATFORM_ANDROID_ARM || XN_PLATFORM == XN_PLATFORM_ANDROID_X86)
static void getApplicationName(XnChar* strAppName, const XnUInt32 nBufferSize)
{
 FILE *pFile;
 size_t length;

 pFile = fopen("/proc/self/cmdline", "r");
 length = fread(strAppName, 1, nBufferSize, pFile);
 fclose(pFile);
}
- Same folder, LinuxThreads.cpp change
#if (XN_PLATFORM == XN_PLATFORM_ANDROID_ARM)
 //Note: It's only going to work if it runs as root! (but if not it fails anyway...)
 param.sched_priority = sched_get_priority_max(nPolicy) - 1;
to
#if (XN_PLATFORM == XN_PLATFORM_ANDROID_ARM || XN_PLATFORM == XN_PLATFORM_ANDROID_X86)
 //Note: It's only going to work if it runs as root! (but if not it fails anyway...)
 param.sched_priority = sched_get_priority_max(nPolicy) - 1;
and
#if (XN_PLATFORM == XN_PLATFORM_ANDROID_ARM)
 //This should also work as a non-root user...
 xnLogWarning(XN_MASK_OS, "Failed to use pthread_setschedparam (%d). Trying setpriority instead...", errno);
to
#if (XN_PLATFORM == XN_PLATFORM_ANDROID_ARM || XN_PLATFORM == XN_PLATFORM_ANDROID_X86)
 //This should also work as a non-root user...
 xnLogWarning(XN_MASK_OS, "Failed to use pthread_setschedparam (%d). Trying setpriority instead...", errno);
- Again in the same folder this time with XnUSBLinux.cpp. Change
#if (XN_PLATFORM == XN_PLATFORM_ANDROID_ARM)
#include <libusb.h>
to
#if (XN_PLATFORM == XN_PLATFORM_ANDROID_ARM || XN_PLATFORM == XN_PLATFORM_ANDROID_X86)
#include <libusb.h>
and
#if (XN_PLATFORM == XN_PLATFORM_ANDROID_ARM)
 // cancel all pending requests
to
#if (XN_PLATFORM == XN_PLATFORM_ANDROID_ARM || XN_PLATFORM == XN_PLATFORM_ANDROID_X86)
 // cancel all pending requests
- Open /yourOpenNIFolder/Source/OpenNI/XnOpenNI.cpp and change
#elif (XN_PLATFORM == XN_PLATFORM_ANDROID_ARM)
 #define XN_OPEN_NI_FILES_LOCATION "/data/ni/"
to
#elif (XN_PLATFORM == XN_PLATFORM_ANDROID_ARM || XN_PLATFORM == XN_PLATFORM_ANDROID_X86)
 #define XN_OPEN_NI_FILES_LOCATION "/data/ni/"
- Now the makefiles, something very important to properly build everything with NDK. Go to /yourOpenNIFolder/Platform/Android/jni and change Application.mk into this
APP_STL := gnustl_static
# Android >= v2.3
APP_PLATFORM := PUT YOUR ANDROID VERSION HERE (android-15) for example

# Build ARMv7-A (armeabi-v7a) machine code as default
APP_ABI := x86
#APP_CFLAGS := -O3 -ftree-vectorize -ffast-math -funroll-loops

APP_CFLAGS += -fPIC

ifeq ($(APP_ABI),armeabi-v7a)
 APP_CFLAGS += -march=armv7-a -mfloat-abi=softfp -mtune=cortex-a9 -mfp=vfpv3-d16 -mfpu=vfp

# optionally add NEON to compilation flags.
# to activate, run: "ndk-build USE_NEON=1"
ifdef USE_NEON
$(call __ndk_info,Building everything with NEON support!)
 APP_CFLAGS += -mfpu=neon -DHAVE_NEON=1 -flax-vector-conversions
endif
endif

APP_CPPFLAGS += -frtti

#$(call __ndk_info,APP_CFLAGS=$(APP_CFLAGS))
#$(call __ndk_info,APP_CPPFLAGS=$(APP_CPPFLAGS))

#-fsingle-precision-constant
We are close to the end! Modifications in PrimeSense drivers are basically of the same kind, enabling ANDROID_X86 to do something, but here is more low level. There are some things explicitly targeting ARM architectures regardless what OS system are you running. I am going to show you the code which works for me but maybe is not the most optimal way to do that and you can get more resolution or more usb transfer speed choosing other transfer mode. Here it goes:
- Open /yourSensorFolder/Source/XnDeviceSensorV2/XnDeviceSensorInit.h guess what…change
#elif (XN_PLATFORM == XN_PLATFORM_LINUX_X86 || XN_PLATFORM == XN_PLATFORM_LINUX_ARM || XN_PLATFORM == XN_PLATFORM_MACOSX || XN_PLATFORM == XN_PLATFORM_ANDROID_ARM)
to
#elif (XN_PLATFORM == XN_PLATFORM_LINUX_X86 || XN_PLATFORM == XN_PLATFORM_LINUX_ARM || XN_PLATFORM == XN_PLATFORM_MACOSX || XN_PLATFORM == XN_PLATFORM_ANDROID_ARM || XN_PLATFORM == XN_PLATFORM_ANDROID_X86)
- In the same folder open XnDeviceSensorInit.cpp and change
#if (XN_PLATFORM == XN_PLATFORM_ANDROID_ARM)
 nRetVal = xnOSCreateMutex(&pDevicePrivateData->hExecuteMutex);
to
#if (XN_PLATFORM == XN_PLATFORM_ANDROID_ARM || XN_PLATFORM == XN_PLATFORM_ANDROID_X86)
 nRetVal = xnOSCreateMutex(&pDevicePrivateData->hExecuteMutex);
- Now with XnExportedSensorDevice.cpp
#if (XN_PLATFORM == XN_PLATFORM_LINUX_ARM || XN_PLATFORM == XN_PLATFORM_ANDROID_ARM)
 #define XN_SENSOR_DEFAULT_MULTI_PROCESS (FALSE)
to
#if (XN_PLATFORM == XN_PLATFORM_LINUX_ARM || XN_PLATFORM == XN_PLATFORM_ANDROID_ARM || XN_PLATFORM == XN_PLATFORM_ANDROID_X86)
 #define XN_SENSOR_DEFAULT_MULTI_PROCESS (FALSE)
- XnSensor.cpp
#if (XN_PLATFORM == XN_PLATFORM_LINUX_ARM || XN_PLATFORM == XN_PLATFORM_ANDROID_ARM)
 #define XN_SENSOR_DEFAULT_USB_INTERFACE XN_SENSOR_USB_INTERFACE_BULK_ENDPOINTS
to
#if (XN_PLATFORM == XN_PLATFORM_LINUX_ARM || XN_PLATFORM == XN_PLATFORM_ANDROID_ARM || XN_PLATFORM == XN_PLATFORM_ANDROID_X86)
 #define XN_SENSOR_DEFAULT_USB_INTERFACE XN_SENSOR_USB_INTERFACE_BULK_ENDPOINTS
- Finally PrimeSense drivers makefiles. Go to /yourSensorFolder/Platform/Android/jni and and change Application.mk into this
APP_STL := gnustl_static
# Android >= v2.3
APP_PLATFORM := PUT YOUR ANDROID VERSION HERE (android-15) for example

# Build ARMv7-A (armeabi-v7a) machine code as default. But I had to modify it to compile for a x86 android target
APP_ABI := x86
#APP_CFLAGS := -O3 -ftree-vectorize -ffast-math -funroll-loops

APP_CFLAGS += -fPIC

ifeq ($(APP_ABI),armeabi-v7a)
 APP_CFLAGS += -march=armv7-a -mfloat-abi=softfp -mtune=cortex-a9 -mfp=vfpv3-d16 -mfpu=vfp

# optionally add NEON to compilation flags.
# to activate, run: "ndk-build USE_NEON=1"
ifdef USE_NEON
$(call __ndk_info,Building everything with NEON support!)
 APP_CFLAGS += -mfpu=neon -DHAVE_NEON=1 -flax-vector-conversions
endif
endif

APP_CPPFLAGS += -frtti

#$(call __ndk_info,APP_CFLAGS=$(APP_CFLAGS))
#$(call __ndk_info,APP_CPPFLAGS=$(APP_CPPFLAGS))

#-fsingle-precision-constant
Now the necessary modifications are done it is possible to build OpenNI and PrimeSense drivers to Android x86. As I said before, just follow the instructions of Hirotaka Niisato and everything should be ok. Now the build is ready we have some binary files that need to be moved to our Android system.
- system/lib
libOpenNI.jni.so
libOpenNI.so
libnimCodecs.so
libnimMockNodes.so
libnimRecorder.so
libusb.so
libXnCore.so
libXnDDK.so
libXnDeviceFile.so
libXnDeviceSensorV2.so
libXnFormats.so
- data/ni/
licenses.xml
modules.xml
- usr/etc/primesense/
GlobalDefaults.ini
I have forked both OpenNI and PrimeSense Sensor repos and I have added this modifications, I am thinking trying to push them to their official repos but probably I am going to be ignored so if you are interested please clone my forked repos of OpenNI and PrimeSense Sensor
Hirotaka did a good tutorial about creating a simple android app with OpenNI but the structure of the project is quite a mess in my humble opinion so I tried to simplify it. I also added some methods to get IR and RGB through classes provided in that simple demo. I will write another post about it.
Feel free to ask any doubt you have. OpenNI can be very tricky sometimes.